Jenny:
Hey guys, it’s Jenny. Welcome back once again to Solid Gold. In yesterday’s bonus video, you guys got to see a sneak peek of my new bioactive dart frog Vivarium. Psst, click here if you missed it. In today’s video, you’re going to get to see how I made the bioactive Vivarium step-by-step from start to finish. Now, this is actually the third bioactive Vivarium that I’ve ever made, but only the first that I’ve actually got to the final step of adding the dart frogs to, so I’m really excited about this.
Back in 2012 when all I really had for pets were goldfish and cats, I found out about poison dart frogs as pets and I became absolutely obsessed with them, and obsessed with the idea of owning a little group of Phyllobates Terribilis, or the golden poison dart frog. Which fun fact the golden poison frog is potentially the single most poisonous animal in the entire world. A single frog has enough toxins on its body in one dose to kill about 10 adult men, so it’s pretty serious.
Like all dart frogs once they are kept in captivity for long enough they actually lose the ability to create these toxins within their bodies. Scientists believe that there’s a particular type of insect, probably some sort of beetle that the frogs have access to in the wild. Those insects allow the frogs bodies to be able to create these poisons within their bodies by ingesting something that is contained within the beetle.
Wild-caught frogs that are brought into captivity, over time they lose their ability to create these toxins and frogs that are captive bred, never have developed those toxin abilities in the first place. Even still it’s probably still a good idea just to be careful with your frogs, as far as handling them goes, just in case. [chuckles] Especially if they were wild caught. Anyways back to my original point, back in 2012, I had finally completed my second dart frog Vivarium.
It was completely ready for frogs that even had my insect cleanup crew added and everything, but then I went through a major life event. I actually went through a divorce, and I had to downsize my life quite a bit after that. The dart from Vivarium, unfortunately, was one of those things that I just couldn’t keep. I had to let go of it. That’s why it’s super exciting for me now, finally, several years later to be realizing this dream.
Yes, fast forward to now, several years later, I’m now fully settled-in in my home in Florida. As you guys know I’ve been building my new fish room out in my backyard and I’m going to have plenty of room in there for all of my goldfish, maybe even some other types of fish. Then in addition some other types of animals, because I don’t just love fish, I love all kinds of animals. Especially reptiles and amphibians. Especially-especially amphibians.
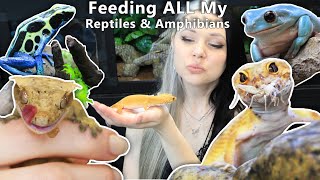
I set aside some space in my fish room for a big rack of six reptile and amphibian enclosures. This time, instead of having my sights set on Phyllobates Terribilis, I wanted to go with something a little bit different, so I got my Dendrobates Tinctorius Patricia, who I’ve had with me now since August, so for several months in a quarantine tank. I ended up choosing these ones, because just like the terrabillis they have outgoing personalities.
They’re very fearless when it comes to interacting with their human caretakers, or even just being out and about and feeding on fruit flies when people are watching them. They really don’t care about that just like the terribilis. Some other types of poison dart frogs can be a little bit more skittish and shy. I definitely wanted one that I would see frequently out and about. Also, I really do prefer their color patterns over the terribilis.
The terribilis are beautiful in their own right, but they’re either all mint green, or all this pretty golden yellow color. With the Tinctorius morphs, you often get frogs that have a lot of different colors going on all within the same frog. I thought that was really cool. They’re also a little bit smaller so the terribilis will stay on the ground level pretty much for the most part, but the tinctoris actually will do a little bit of climbing. I thought that would be more interesting too.
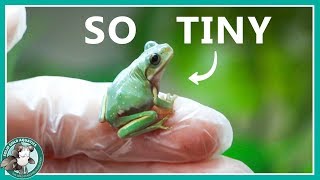
There are so many different species of poison dart frogs out there, everything from the large and confident Phyllobates Terribilis, down to the teeny tiny thumbnail frogs which literally are small enough to fit on your thumbnail, and they’re really fascinating as well. There’s so many different types of dart frogs, which is part of the reason why I find them so fascinating and awesome.
Anyways, I just kind of wanted to give you guys that background information on why I ended up choosing poison dart frogs, and why I’m so passionate about them. I really do love these little guys, they are so amazing to me. I felt like, a lot of you guys have been here since the early days of my channel, and you may even remember that there was couple of videos that I posted about the first of the vivariums that I ever made back in around 2012 that have since been removed from my channel actually.
A lot of you guys, a lot more of you guys are newer than that, so you may not know all of this history. Before jumping into the vivarium construction video here, I just wanted to bring you guys all up to speed. With that being said buckle up. The tank I’m using to create this bioactive vivarium, is a tank that I recently got from Custom Aquariums. If you guys miss the video of these terrariums/vivariums, and the rack system for them being delivered to my house.
Click, on the link in this video you definitely want to see that video, because it was crazy. A huge semi pulled up my driveway and delivered these three huge crates for me to unload. It was a little insane. The closest thing I can compare these tanks to would be something like an EXO Tara. Although, it’s not a perfect comparison because the amphibious tanks from Custom Aquariums actually are built a lot sturdier.
These are similar because they both hold water on the bottom, and then on the front they have doors you can open to access the enclosure from the front. With these amphibious tanks, if you want you can set up the bottom like a fully functioning aquarium. Then on the top you can have some arboreal species if you want. Or you can simply just have plants growing up out of the water on a really nice fake but real looking background, or really just do anything you want with these tanks.
They’re very very cool, in that you can just let your creativity go wild. I was able to specify what type of lid I wanted over the amphibious tanks. Custom Aquariums actually had a lot of different options, but poison dart frogs actually prefer a humidity level of around 100%. Pretty crazy. You really want a full blast lid to seal in all of that humidity, they don’t like anything lower than 80% for humidity.
I was also able to specify where if any I wanted holes drilled on the top. I did have two custom holes drilled for my Mist King misting nozzles. Then I also had them drill a hole on the back wall really close to the bottom for water drainage. The first thing I had to do in building my vivarium was to construct the false bottom. There are a lot of different methods you can use to do this, but my favorite method is to use and create light diffuser.
Which you can find readily at your hardware store, and it’s only around like $15 per sheet. It’s pretty affordable and it’s pretty easy to work with as well. The false bottom is essentially an elevated platform on top of which the vivarium soil and plants are going to sit. It allows for a place for all the excess water from your misting system to go without having your plant roots sit in wet bog light conditions, which wouldn’t be good for them.
Notice also that I added a support piece in the middle there to help hold up the weight of the hardscape that’s going to sit on top of this false bottom. The water sitting under the false bottom also helps keep the humidity level in the tank nice and high for the dart frogs, which as we know they really like. The height of my false bottom is about one inch above the water surface to prevent water wicking up into the substrate.
I wanted the false bottom to be hidden from you so you couldn’t even tell it was there. I made it smaller than the actual footprint of my tank, and I left a gap of about one inch in between the false bottom and the glass sides of the tank on the front and also on both sides. I then wrapped the entire false bottom with mesh window screen materials, securing it in place with– Yes, you guessed it. More zip ties.
This screen layer is going to prevent the substrate layer on top from falling down through the holes in the anchor and getting into the water layer below. Next, I cut to size and siliconed on the background for this tank. I got this foam background on line, and I like the simplicity of it for this particular tank. You can also make really cool DIY backgrounds out of great stuff expanding foam from the hardware store.
Usually you want to get the waterfall type, and then when it’s still tacky you press in cocoa fibers, so it gives it a more natural appearance. That looks really cool as well, but for my purposes, I went with a premade background for this tank. I first siliconed the background onto the back wall of the tank and weighed it down with some heavy buckets. Then the next day came back and sealed all the edges of the background with a silicon bead to ensure no bugs or frogs could get behind it.
When smoothing out the bead of silicone with your finger, it really helps to continuously dip your finger in rubbing alcohol and then wipe off the excess silicone as you need to as you go. Because this way the silicone won’t stick to your finger and you can actually smooth it out properly. Also, as I found out, it really helps if one of your acrylic nails has accidentally fallen off, so you can actually use your fingertip to smooth it out. I guess that was a blessing in disguise. Anyways once the silicone for the background had cured, I placed the false bottom in the tank and then filled in all the gaps that I left with aquarium substrate, so the false bottom is completely invisible from every single viewing angle possible. The only way you can see the false bottom is if you view the tank from behind, and you can’t do that since it’s sitting on a rack. I used Fluval stratum for my tank because I think it looks really nice and natural, but you can pretty much use any aquarium gravel that you want.
Then it was time to play around with different placement options for my driftwood pieces I had gotten from my local fish store. This wood was labeled as Pandora wood, it was also labeled as Caspian wood, I don’t really know exactly what it is, except that the local fish store owner told me that it’s actually a root structure from a type of tree found only in Africa. That’s cool. Once I was happy with the placement of my wood hardscape, it was then time to add the substrate around it.
I used a mixed substrate which called ABG mix, and it stands for Atlanta Botanical Gardens mix, because they’re the ones that developed this substrate. It’s great for growing tropical plants fast and it holds up really, really well in wet environments for a long period of time. It’s probably the most popular choice for dart frog vivariums. I decided to create a gradient, starting low on the front left corner and getting higher at the back right corner, to create more visual depth within the tank.
Also because, by the time the false bottom was in, I really didn’t have much depth especially at the front edge of the vivarium to build up the substrate. To get around that I made a gradient from shallow to deep in the back, and it turned out really well, so I guess it works. I think all told, I ended up adding six-gallon bags of ABG mix substrate to this tank. On the glass lid, I noticed that there were gaps, especially in the four corners of the tanks.
I picked up this foam gasket from the hardware store and added it around the entire lid to create an airtight seal all around. This way no fruit flies will be able to escape, and the humidity level which the frogs love and need will remain locked in. Then I added the Mist King misting nozzles to the lid, and with the help of Chris, slid the entire tank with the hardscape completed onto the rack in place.
I attached the drainage hose to the bulkhead in the back, and then this hose leads down into a wastewater reservoir underneath the rack. As I begin misting this tank the water level under the false bottom will continually rise until it reaches the drain hole. Then it will just continuously drain to keep a consistent water level under the false bottom. Then it was time to finally add the live plants.
I had been collecting a variety of really good tropical plants for high humidity dart frog tanks that I found at my local hardware store for a couple of months in the lead up to this tank build. Crazy plant hoarder lady, that’s me. Rather than buying clippings or small plants from online vivarium stores, I opted to just buy the full plants locally. Then very very thoroughly wash off the planets themselves, but also remove all the soil they were potted in and spray off the roots too.
This is super important because the plants in the soil could contain pesticides or fertilizers, or other harmful things that would be really unhealthy for the frogs to have in their environment. I clean them off really well. It also does mean that in order to plant these plants, I had to put them through a bit of stress in this process. I pretty sure I’m going to have some initial plant die-off or melting as they adjust to the vivarium.
Being that plants grow really fast in vivarium conditions though, they should bounce back fairly quickly. The ones that don’t I guess I just won’t have in this particular vivarium. The rabbit’s foot fern has to be my favorite plant in this tank. First of all, I’m just always drawn to ferns I love how they look. This one is really cool because its rhizome is fuzzy like a little rabbit’s foot. I planted the fern near the driftwood pieces, and the ficus Camilla also known as creeping fig near the background.
With the ficus Camilla I pinned some of the tendrils onto the background using stainless steel staples. Hopefully as they grow, they will latch onto the background and grow all over it and cover it up and look really cool. Hopefully. I planted the rainbow Selaginella moss near the driftwood and draped it all over it, so it would look like it was growing on it and eventually as it grows in it will actually be growing on it.
I also planted these small orchids called Jewel Orchids, that have beautiful red and green leaves with striking lines through them, that were a lucky find for me at a local Plant Festival actually. I can’t wait to see the tiny little flowers that these guys are going to produce, it’s going to look so pretty. Lastly, even though it was a little ill-advised I really wanted to try my luck with a miniature Phalaenopsis orchid as a centerpiece on the driftwood.
In doing my research, it seems like a few people; although, not many have had success with Phalaenopsis orchids in their dart frog tanks, but I think it’s going to be too humid for this plant. Actually, as of editing this video the mini fowl has been in the tank for a week now and it’s not looking very good. The leaves and roots just don’t dry out enough between misting, so it’s really not the right environment for this kind of plant, but we’ll see what happens.
After all the plants were in it, it was finally time to add some bugs. Yes, bugs. I am purposely adding bugs to one of my animal’s enclosures. Awesome. I chose an insect cleanup crew of springtails and isopods that I bought at an online vivarium supply store. This; although, it may sound weird if this is new to you, the bugs are the secret key ingredient that makes this tank a self-cleaning, self-sustaining environment for the frogs.
The bugs live in the soil, breaking down decaying plant matter and frog poop. The bugs can also serve as an occasional snack for the frogs in between their fruit fly feedings. I topped off the soil with a layer of live oak leaf litter which you can buy online, but since I live in the south I have an abundant supply of it in my backyard. If you do collect it from outside, you just want to make sure that you collect it from a pesticide-free area, and it’s a good idea to sanitize it before putting it in any vivarium.
There are actually a lot of slugs in my yard, so I picked through the leaves carefully to avoid slugs. Then I steamed the leaves with water in the microwave to eliminate as many pests hitchhikers as possible. There are a lot of ways of sanitizing leaves and this is just one way. I’m saying sanitize on purpose instead of sterilized, because keep in mind that no way offers 100% sterilization of living matter on the leaves.
This is just a precaution to help cut down on harmful hitchhikers. The leaf litter is important because it gradually breaks down inside the vivarium creating a food source for the insect cleanup crew. It also creates plentiful options for the frogs to burrow into cozy hiding spots to sleep, and they really do love that. With the leaf litter and then to cocoa Hut hides out of the vivarium was finally complete and ready for the addition of my four Dendrobates Tinctorius Patricia dart frogs.
Who have been growing out in their temporary quarantine tank, have had clean fecal exams done with no parasites showing, and are patiently waiting for their awesome new home. This video is already plenty long enough, so I’m going to end it here. Don’t worry, I’m not going to make you guys wait too much longer before you get to see the frogs being added to the vivarium. I’m actually going to do a special bonus video tomorrow on Saturday that is showing the frogs being added to this tank.
I have so much absolutely adorable footage of the frogs exploring every square inch literally of their new home and eating fruit flies in their new home, it is just so cute you’re going to love it and I can’t wait to share it with you guys in tomorrow’s bonus video. Thank you guys for watching I really hope that you like the new bioactive dart frog vivarium, this is just the first of six new habitats for reptiles and/or amphibians that I’ll be setting up on this rat from Custom Aquariums, so there’s going to be a lot more videos like this to come.
Plus, I just got word from Aqua Decor that my new backgrounds they have made for my four aquariums that I have sitting here waiting to be put together, they finally finished those backgrounds, and also there’s three backgrounds for three of the habitats on my terrarium/vivarium rack here too. All I’m waiting for now is for them to be shipped to me, which will be probably another one to three weeks. Before too long there’s going to be a lot more exciting things happening.
I’ll finally be able to start setting up these aquariums for my goldfish, and moving the goldfish into those aquariums is going to be so amazing and so exciting. That’s going to be a great day. I’m going to have to celebrate because this has been such a long time coming, and I’m sure you guys are really antsy to finally see some progress with the aquariums, as am I, trust me. Lots of exciting things will be happening here in the near future, definitely make sure you stay tuned for that, and until next time stay gold.
Hey, guys, I have a new merch design that I’m really excited to share with all of you. There is an artist that I followed a little while ago she made a watercolor painting of me with some goldfish swimming around it, I have loved that piece of artwork ever since she made it and only recently did I approached her about turning into some merch for my channel. Officially we have some new Solid Gold merch. I’ll show you guys the t-shirt I’m actually wearing it right now.
It’s as Solid Gold Aquatics, and look at how cute that is. I wish I actually looked that cute in real life, because oh my god. It’s available in t-shirts and also tank tops. Yes, that’s a tank top. Also on mugs and stickers. I know you need another Solid Gold sticker in your life, your laptop looks a little bare. These are available on my teespring store you guys. Check out the link in the description section down below. Thanks for watching and I’ll see you next time.