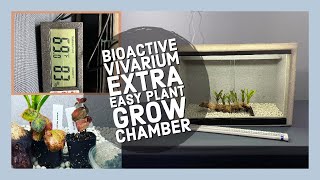
Ted: The last time that I shared the vivarium project with you, I showed you the lighting, the fogger, humidity systems, control systems, and I put a few plants in the vivarium to get it started. That was actually about a month ago, and since then I’ve gotten more plants. Some of them are ready to go into the vivarium. The others were cuttings, and they had to go into the growth chamber.
Then, yesterday a friend of mine sent me a lot of plants, they’re all cuttings. These are going to have to go into the growth chamber. Before that can happen, what’s in there, which have been growing for about a month, have to go up into the vivarium.
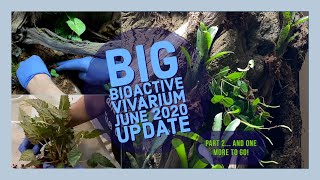
Today, I’m going to catch you up with what’s been going on for the past month, show you some of the changes that I’ve done to vivariums, and talk about plants.
Overall, the bioactive vivarium has been doing very well, at least in my opinion. I have made a couple of changes that I will go over, but here are the plants that went into the enclosure on that first day. The miniature Neoregelia bromeliads have opened up a bit, and look great, so I assume they’re doing well. The pellionia repens, that’s been the slowest grower. It hasn’t done a whole lot, it sprung a few new leaves, but it really hasn’t expanded in size. The begonia species ‘Manaus,’ on the other hand, has been the fastest grower so far, and it’s probably doubled in size.
The begonia glabra took a while to do much of anything, but it has grown more quickly over the past two weeks. The biggest change that I have made to the vivarium systems is to replace one of the LED lights with a Zoo Med high output T5 fluorescent fixture, with two 6500k bulbs. It is not as long as the LED fixture, so it will give me some space over the basking site in the enclosure for a basking lamp. I can replace one of the current tubes in the fixture with a UVB tube. I also like the warmer color overall that the light fixture gives off. I think that the plants have responded to it pretty well. At least I’ve not seen a negative reaction from the plants.
With the new light in place, I was able to choose the final location for the fog emitters. Now, the openings are directly inside the enclosure, the fog effect is much more intense and efficient. I’ve made a few minor adjustments to the frequency of fogging, air circulation, and misting. For the most part, I’m still managing to keep the relative humidity in the enclosure above 75% all the time, and most of the daytime at 85% or higher. The day after I put the first plants in the vivarium, I received another box of plants and recorded this video. Yesterday afternoon, I got all the plants that I had in my growth chamber planted up into the vivarium upstairs.
Then, today, I got a big box of plants from my friend Paul, vivariums in the mist. Most of what he said came as cuttings. I’ve got to figure out exactly how to deal with that. I’ve said this before and will repeat it often, “I am not an expert at anything, and vivarium plants are way down on the list of things I know much about.” A lot of this project has been doing research on the fly. Most of the cuttings I set up in this way, using a pot with ABG mix amended with a little more peat, and long fibrous sphagnum moss, over a bottom layer of drainage material. I strip the leaves away from a few nodes, plant the stem into the substrate, and then top the pot with a layer of wet moss.
I will show you some other methods of rooting that I have used in a bit, but this is what has been working for 90% of the plants that I have started with.
I got all the cuttings that I received from vivariums in the mist setup and substrate to root a bit, and for the most part they all did very well. A couple of the cuttings have been slow to get going. My friends Tristan and Dave Watson called to tell me they had some plants for me. The same Tristan from Tristan’s Tropical Fish you’ve heard me talk about before. I took a drive over to their greenhouse fish room to look around. Dave, Tristan’s dad, has gotten into orchids in a big way. The back section of the greenhouse is now dedicated to growing them. Please, note that Tristan and Dave are not selling orchids or vivarium plants, so, please, don’t ask them.
They had a few extra non-orchid plants to give me for the vivarium but also wanted me to try a couple of orchids that should do well in there. Including this little Oncidium velutinum variety, and a weird-looking orchid with small pseudobulbs and thread-like leaves that we have not identified yet, and this orchid which is also as of yet unidentified. This one has a backstory which I’ll tell you a little bit about when I plant it into the vivarium.
One of the plants they gave me is this larger Neoregelia species bromeliad. I attached it to the end of the horizontal branch under the group of broms already in the enclosure. I hope that the many neos I put in at first do not grow as large as this plant. Dave and Tristan also gave me this hoya species which I planted in the back of the vivarium. I hope it will grow up and along the vine on the back wall. Hoya can grow pretty big, and they are more of a house plant than a vivarium plant. I will give it a shot for a while. I can always pull it out. I attached a little Oncidium near the top of the enclosure on the faux tree trunk.
I tried to follow Dave’s advice and glue it into place, but, for some reason, the glue that I was using would not stick. I have embedded in some sphagnum moss for the time being. Once it becomes established, maybe I can pull some of that moss out. The odd thread-like orchid went up into the very top center of the scape in between the branches of the tree trunk. The way it was growing in the greenhouse, it created this big bird nest look that was very, very loose. I’m hoping that’ll repeat that in the top of the enclosure. Now, this orchid I am really excited about. I may or may not have picked this off a tree down in Colombia the last time I was there.
If I had done that, it would be because the tree was falling down in a river or along a riverbank, and every plant in the canopy of that tree was going to die. If I had done that, then I would have brought it home and give it to a friend of mine who has a nice greenhouse, and he’s really good with orchids, to see if he could save it. If that had happened, then I would have gotten it back from him and have an opportunity to put it in my vivarium. Maybe that happened, but bringing plants back from Colombia is not exactly legal, so I probably didn’t do that. Maybe I did, but probably not.
On the same day that I put the orchids into the vivarium, I also let a bunch of powder orange isopods go. These also came to me from vivariums in the mist. They disappear into the substrate pretty quickly, and I have not seen them since. That catches us up to today, 22 days after the first plants went into the vivarium. Here are all the plants that have been in the growth chamber for about a month. Let me get some of them out and show you the ones that we’re going to put into the vivarium today.
One of the ones that’s been doing the best has been this begonia glabra. Now, there’s one of these that’s already in the vivarium, but I really would like to get these, which are actually very well rooted now, in there with that one so they can really fill up that space. That’s going to go. Another begonia that’s ready to go into the vivarium is this begonia thelmae. Now, I’ve got- each of these are four cuttings, they’re all well-rooted, then I’ve got three more little leaf cuttings. They’re actually- they feel like they’re rooted as well, but these may not go in. I’m going to set those aside. I’m going to start with these, and get these into the vivarium.
I would really like to get this ficus in there. This is ficus radicans, and it’s got this really nice new leaf here, and feeling it’s pretty well-rooted as well, get that in there. I’ve got a couple more of these ficus. This one I don’t think is really ready to go yet. These might be, but most of these were just like leaf cuttings as well. I have to inspect those. If any of these are ready to go, I might put those in as well. This one, for sure, that’s going to go into the vivarium. This is Cissus amazonica, and this one’s not ready to go. It’s probably rooting, but it’s such a weak, little plant. I don’t think it’s going to be able to make it.
This one has got a single cutting into it, and it’s– Oh, no, it’s not ready to go either. I think it needs more time. This one, there’s two cuttings in there. These are probably ready to go. I’m going to go ahead and give it a shot. I’m going to try these two and let the other ones continue to grow a little bit. This other Cissus is this color. I have to inspect these to see if some of them– I’m getting some new leaves. There’s new leaves here and here, except for this one leaf right there, all the other leaves have done really well. This one, I didn’t re-pot myself. It came in this basket. This is Peperomia quadrangularis, and it’s been doing really well. Look at the blooms that are on it. Ain’t that cool?
My challenge I have with this is I don’t want to put this basket in the vivarium, but this plant is ready to go in the vivarium, so I have to figure out how I’m going to get that– I’ve got a bug. Where did he come from? It must have been outside. He doesn’t look like he’s in very good condition.
I’ll have to inspect these plants really carefully to make sure I don’t have any more of those in there. I’m pretty sure he just got attracted by the light and [unintelligible 00:11:02] in through the door. Anyway, I got to get this into the vivarium. What else have I got? This is another one that has been planted in here for a while. This is the Peperomia guttulata, baby tears, Ecuador. Again, it’s on this piece of wood. I don’t really want to plant this piece of wood in the vivarium, so I’ve got to figure out how I’m going to get it off this wood and into the vivarium.
I think if I just cut these pieces of fishing line, maybe this whole plaque will come off and I can actually use my thread and tie that to a branch. We’ll try it.
Here are those network plants that I tried cuttings three different ways to see how well they would do. These I just rooted in water. I’m getting some pretty good root growth on this one right there. Each of them has a little bit of root growth on it, but they’re not ready to go in yet, so they’re going to have to stay here and root some more. Actually, I probably don’t need to keep these in here. This is a house plant. I can keep that somewhere else in the house if I’m running out of space.
This is the same plant that I rooted in my ABG Mix with some long-fiber sphagnum moss on top. I’m not sure if those are ready to go yet or not. We’ll find out. Then, these are just in long-fiber sphagnum moss. I see some new growth on this one. Let’s pull it up and take a look. Look at that. Some pretty good root growth. I imagine if I plant this up in the vivarium, it’ll do just fine, so maybe I’ll try that. Maybe I’ll pick a couple of these network plants that are ready to go and get those into the vivarium as well.
This is the original rootstock of that network plant, and I’m getting some new growth on it as well, but I’ve got so many of them over here. I don’t know if I’m actually going to need this. I may end up just moving this out of the growth chamber to create space. Then, these are going to go. This is the Selaginella. Actually, I probably should have put this into the vivarium right away, but we’re going to get it into the vivarium today.
I wouldn’t say it’s doing great in here. I think it’ll do better in the vivarium. Then, this is a begonia. It’s actually a house plant begonia, and I’ve got more of this upstairs. What I’m going to do with this, this is going to go into a planter that’s going to go out of the top of the universal rocks fake log. Then, I’ve been debating this. After watching them in here, I think that it’s not a very large species.
These are those Nepenthes. You can see that this one’s got two. One is unopened. One is opened, pitcher. They’re not massive. They probably get a lot bigger than this, but I’m going to go ahead and I’m going to put those in the vivarium. There’s no animals in there. I want to see how well they do and if I have to pull them out later, I’ll have to pull them out later, so those are going to go.
Really, the only thing that’s possibly going to stay in here are these Ficus radicans. These two are Cissus amazonica. These network plants though, I might move those network plants out into the house somewhere to create enough space inside here for all those new plants that I’ve got. Once again, I have completely underestimated how long this update would be. If I kept going, this video would stretch out to about 40 minutes if I included everything that I wanted to show you.
Here’s a glimpse of the end result with all the plants that went in today. I’m going to end this update here and will post another one tomorrow showing how these plants were prepared to go into the vivarium and putting them in. If there is enough time, I will also share all the new plants that are going into the growth chamber to quarantine. Lots of cool stuff to see. Thanks for watching.